Wig Installation for Complete Beginners: Step-by-Step, No Salon, No Glue
The full at-home install in six steps — prep, cap, position, secure, blend, and the end-of-day ritual — written for first-timers with a $30 gear list and the five mistakes every beginner makes.
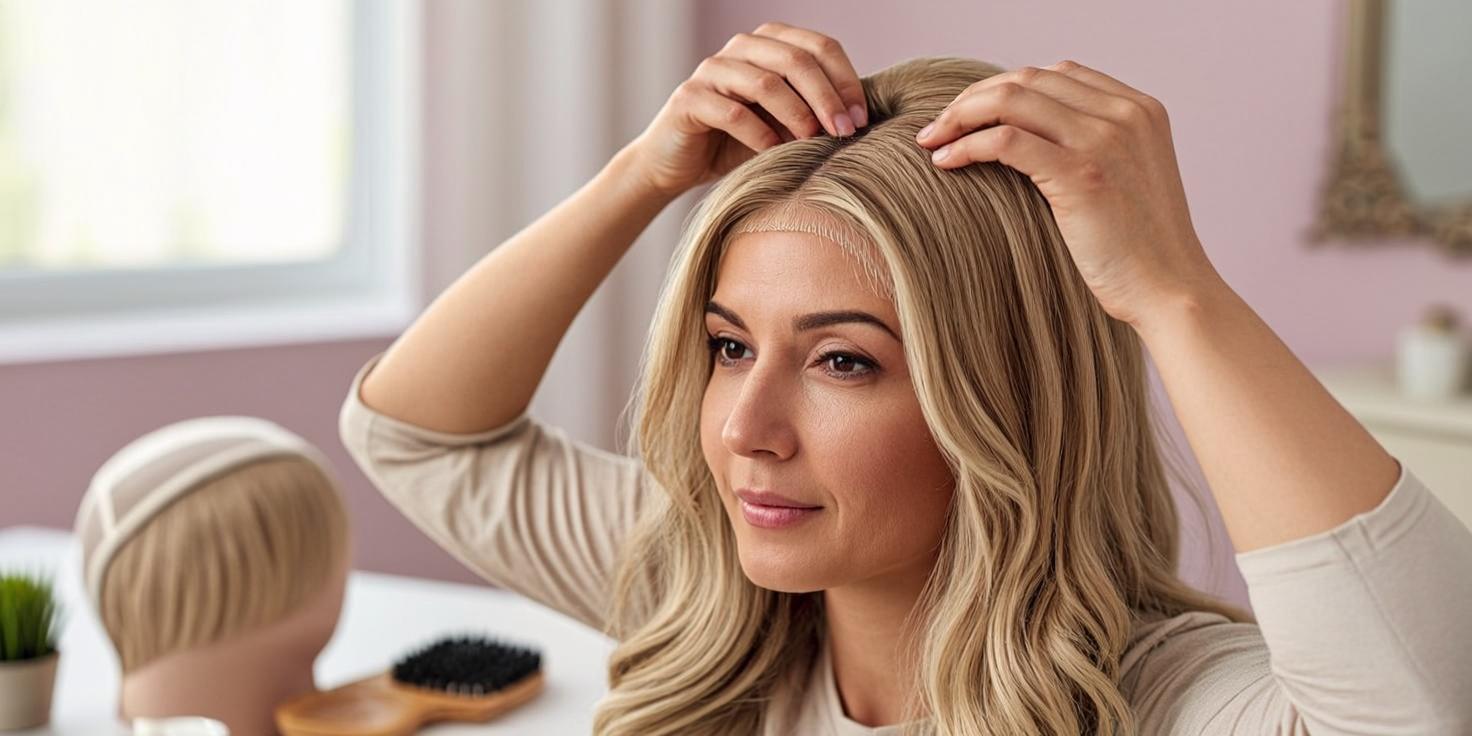
Every wig-wearer remembers their first install: the terror of the lace, the four YouTube tutorials all contradicting each other, the moment the wig ends up... fine, actually. That moment of surprise is what this guide is for. Installing a wig at home is not a talent — it's a checklist, and the glueless revolution has cut the checklist roughly in half.
We'll walk through the full beginner install in the order you'll actually perform it: prep, protect, position, secure, blend, and style. No salon, no glue (unless you want it), and nothing here requires more than a mirror and fifteen minutes. Follow it twice and it becomes muscle memory.
The Gear List (All of It Under $30 Total)
You do not need a professional kit. You need: a wig cap (nylon or mesh, whatever your scalp tolerates), a wide-tooth comb, a tail comb or small brush for laying edges, bobby pins that match the wig's color, scissors with a fine tip if your lace isn't pre-cut, and optionally a holding gel or edge control. That's the whole list. Everything else — bandana for sleeping, water spray bottle — you already own.
One upgrade worth making immediately: a satin or silk scarf for nighttime. It costs a few dollars and it is the single highest-leverage accessory in wig-wearing, protecting both the wig's fiber and your hairline while you sleep. Everything else on the gear list is negotiable; the scarf is not.
Step 1: Prep Your Bio Hair
Flat hair makes a flat foundation, and a lumpy foundation telegraphs "wig" from across the street. The goal is to get your bio hair as smooth and close to the scalp as your length allows.
Short hair (under 4 inches): brush it back with a light gel or water, then hold it with the wig cap directly — you're done.
Medium hair (4–10 inches): create flat cornrows going straight back from your hairline to your nape. Cornrows are the traditional foundation because they're flat, they're secure, and they distribute the wig's grip evenly. If cornrows aren't your skill, a slicked-back low bun held by two bobby pins under a wig cap achieves 90% of the same flatness.
Long hair (10+ inches): braid it into two low braids, wrap them flat around the base of your head like a crown, and pin them flat with bobby pins every two inches. Then cap over the whole thing.
Important: leave your edges out if you plan to blend them over the wig's hairline later. If you're wearing a headband wig or a style with bangs, don't bother — full coverage under the cap is fine.
Step 2: The Wig Cap
Pull the cap on from front to back, sitting it right at your natural hairline — not behind it, not over it. Tuck in every stray strand, and check your profile in the mirror: the cap should read as a smooth helmet, with no bumps hiding cornrows and no hair escaping at the temples.
Some scalps react to nylon; if yours itches, switch to a mesh or bamboo cap — or skip the cap entirely if your bio hair is very short, since many glueless wigs have soft enough bands to wear directly on a low-fade or buzzed head.
Step 3: Position the Wig (Front Edge First)
This is the step that decides whether the install looks natural, and the rule is counterintuitive: place the front edge at your natural hairline, not behind it. A wig sitting an inch back creates a visible "forehead gap" — the instant costume tell. If anything, let the lace front edge sit a hair forward of your natural line; you can always ease it back a millimeter, but you can't hide a gap.
Work blind-free: hold the wig by its ear tabs, line the front edge up with your hairline at the center of your forehead first, then guide each side down over the ears. Check the level in the mirror — the ear tabs should sit exactly at the same height on both sides. A crooked install is 90% an ear-tab problem.
Then pull the nape down and over the back of the cap, all the way to the bottom of your occipital bone. A wig whose nape edge stops short of your natural hairline will ride up all day no matter how well the front is secured.
Step 4: Secure It
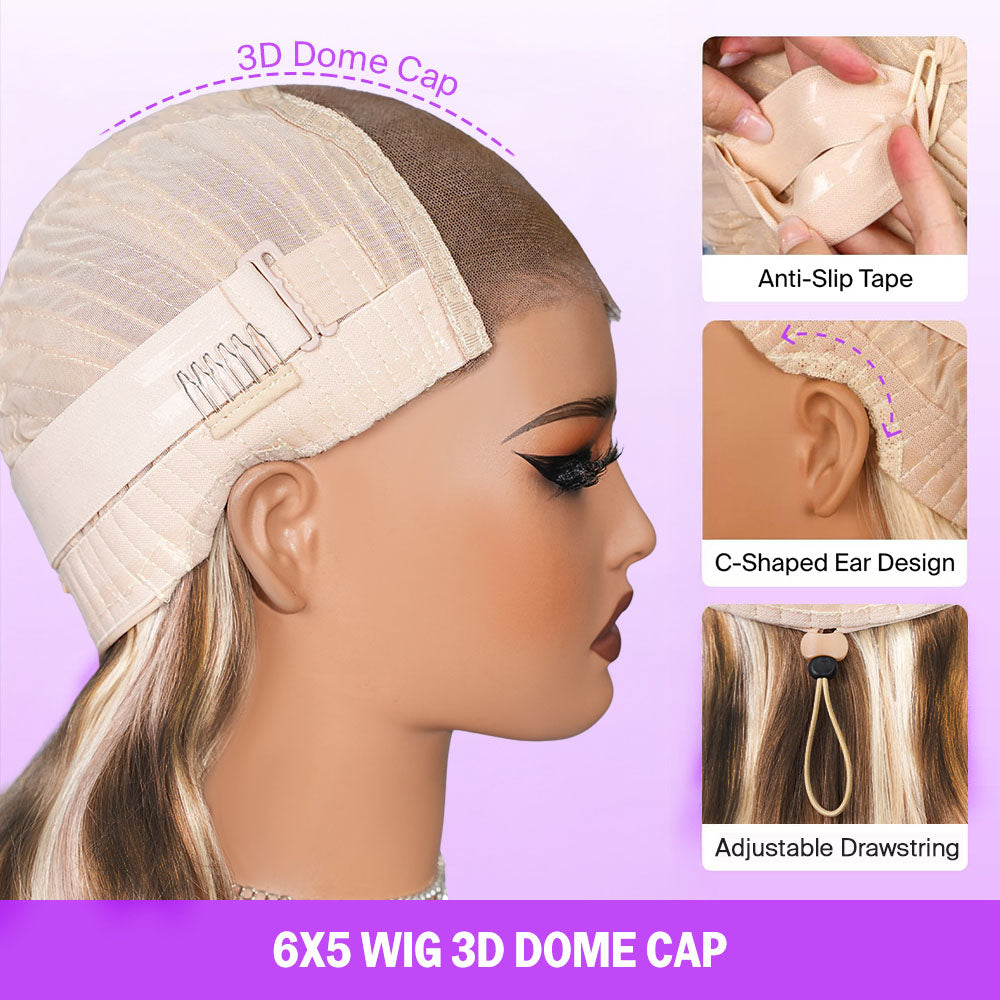
Here's where the modern beginner is spoiled rotten. If your wig is a current-generation glueless design — adjustable strap at the nape, combs at the front and sides, and ideally a grip band — you're done securing already: tighten the strap until snug, press the combs into the cap, and move on. The "Bye Bye Slip" anti-slip band designs anchor themselves; the whole step takes ten seconds.
The easiest full-featured example we carry is BEEOS's 2x6 closure — minimal lace to worry about, pre-plucked hairline, and a glueless cap that genuinely stays:
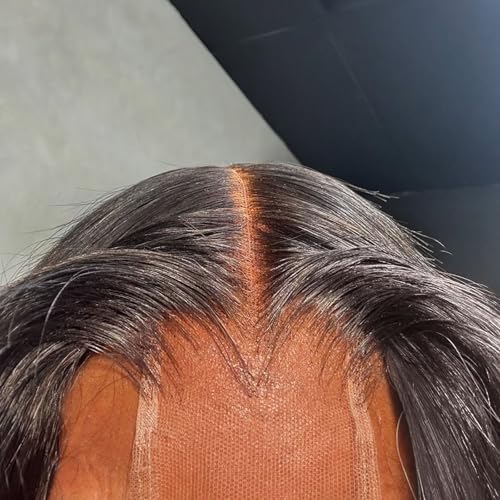
The easiest lace you'll ever blend: a 0.01mm 'invisible' 2x6 closure, pre-plucked, $44.99.
If your wig is a lace front without the glueless hardware, you have two honest options as a beginner. The first is bobby pins: two crossed pins at each temple through the cap's edge and your wig cap, one at each side, three at the nape. It holds surprisingly well and damages nothing. The second is adhesive — and our advice is to defer it. Glue (lace glue or tape) is for special occasions, longevity installs, and people who've already mastered positioning, because glue locks in mistakes as faithfully as it locks in successes.
Step 5: Blend the Hairline
The hairline is where installs become invisible, and the modern shortcut deserves its fame: pre-plucked, pre-cut wigs arrive pre-blended. The factory plucks the hairline into a natural density gradient and cuts the lace along it, so the "blend" step collapses to: make sure the lace lies flat, and go.
If your unit needs help, the classic beginner blend is three moves. First, check for a lace edge shelf — any lace standing proud of the skin needs to lay flat (a warm breath on your palm, then pressing gently, softens lace into place). Second, use makeup: a swipe of foundation on the lace's mesh makes the grid disappear — this is the oldest trick in the book because it works instantly. Third, if you left your edges out, brush them back over the wig's front edge with a little edge control, creating a seamless union of bio hair and wig hair.
Then style as the wig demands — finger-comb a body wave, pick a curl pattern from the ends up, brush a straight style into a side part. Never brush wet human-hair wigs from the roots; start at the ends and work up.
Step 6: The End-of-Day Ritual
Two moves and your wig thanks you tomorrow. First, the nightly wrap: satin scarf tied around the hairline (pineapple the hair up first if it's past 18 inches), which preserves both the style and the lace. Second, whenever you're done with the wig for the day, remove it by lifting the nape first, then peeling forward — reversing the install order. Yanking from the front stresses the lace, which is the most expensive part of the wig to damage.
Which Wigs Make Installs Easiest?
If you're shopping specifically for install-ease, three constructions dominate. Closure wigs (4x4, 5x5, 2x6, 7x5) have the least lace to blend — BEEOS's ultra-thin 2x6 above is the extreme case, nearly zero blend required. Pre-set part styles remove even the styling decisions — UNICE's side-part water wave bob installs and walks out the door in one motion:
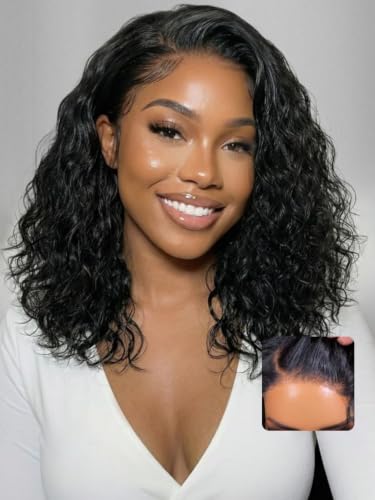
A 220%-density water wave bob with a set side part — the easiest 'done' look in this catalog.
And full wear-and-go lines with anti-slip bands (Luvme's 7x6, UNICE's Bye Bye Slip) are engineered so steps three and four collapse into "put it on straight and tighten." The density is what makes the result look salon-finished:

Kinky loose body wave at 4.5 stars across 3,900+ ratings — the natural-texture benchmark.
At the other end, full frontal 13x6 premium units like BEEOS's SKINLIKE are the most beautiful and the most demanding — the melt is factory-done, but positioning and nightly care matter most on hairline-forward designs. Buy one when the basics below feel boring, not before:
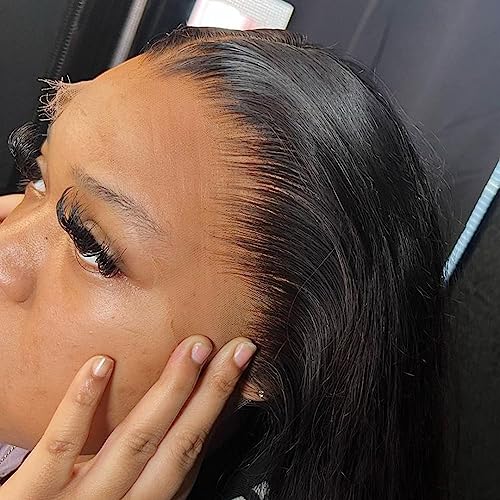
The premium play: 'skinlike' lace engineered to melt at the hairline, 4.5 stars from 360+ buyers.
The Five Beginner Mistakes (We Get Mail About All of Them)
Installing too far back. The forehead gap — covered above, and still the #1 email subject. Front edge at the hairline. Always.
Skipping the nache pull-down. The wig rides up, gets blamed for being "too big," and gets returned. Pull the nape all the way down before judging fit.
Brushing from the roots. Rips knots, sheds hair, ruins lace. Ends first, roots last — it's ten extra seconds.
Sleeping in the wig unprotected. One night on a cotton pillowcase does more frizz damage than a month of wear. The satin scarf is cheaper than the headache.
Glue on day one. Adhesive before you've mastered positioning means repositioning pain, hairline stress, and cleanup frustration. Bobby pins hold fine while you learn. Graduate to glue when pins feel slow, not before.
Q: How long does a beginner wig install take?
Your first time: fifteen to twenty unhurried minutes, mostly spent checking the mirror. By the fifth install: five minutes. Experienced glueless wearers routinely do the whole thing — prep, position, secure, blend — in under ninety seconds, which is the entire selling point of the wear-and-go category.
Q: Do I need glue to wear a lace front wig?
No. Adjustable straps, combs, grip bands, and strategically placed bobby pins hold a lace front securely for everyday wear. Glue buys you extra security for high-movement days (dancing, swimming, wind) and a flatter-than-flat lace edge, at the cost of application time, removal chemistry, and hairline diligence. Most modern buyers wear lace fronts gluelessly all week and save adhesive for events.
Q: Can I wear a wig without a wig cap?
Yes, with two conditions: your bio hair is short enough to lie flat on its own, and your scalp tolerates the wig's inner band directly. Caps solve hygiene (a washable barrier between scalp and wig) and slip (nylon grips bio hair), so long-haired wearers should always cap up. If you wear daily, a cap also stretches the time between wig washes considerably.
Q: How do I know my wig is on straight?
The ear tabs are the level — if they sit at equal heights against both ears, the wig is straight, full stop. When in doubt, check three landmarks in the mirror: front edge centered on your hairline, ear tabs level, nape edge centered at the bottom. Two of three correct usually means the third is off by a rotation you can feel before you see.
Q: How tight should a wig feel?
Snug enough that you forget it's there, loose enough that you can slide a fingertip under the edge at the temple without prying. A wig that leaves a headache at bedtime is a full size or strap-notch too tight — loosen it, because a stretched-out cap and a stressed scalp are both worse problems than a slightly loose fit handled with a grip band.
Comments
Recommended in this guide
Top RatedHuman HairKinky loose body wave at 4.5 stars across 3,900+ ratings — the natural-texture benchmark.
Premium PickHuman HairThe premium play: 'skinlike' lace engineered to melt at the hairline, 4.5 stars from 360+ buyers.
Beginner PickHuman HairThe easiest lace you'll ever blend: a 0.01mm 'invisible' 2x6 closure, pre-plucked, $44.99.
Beginner PickHuman HairA 220%-density water wave bob with a set side part — the easiest 'done' look in this catalog.
Related guides
The 7 Best Glueless Wigs for Beginners (No Adhesive Needed)
Glueless caps, combs, elastic bands and headband designs — the easiest wigs to install if you've never worn one before.
Glueless vs Traditional Glued Wigs: Time, Scalp Health and Security
Gluing wigs down is a tradition with real costs — 45-minute installs, adhesive on your skin, edge thinning. Glueless builds changed the math. Here's the full comparison.
How to Measure Your Head for a Wig: The Complete Cap Size Guide
Five minutes with a soft tape saves a bad wig day: the four measurements that determine wig fit, the size chart in plain inches, what to do between sizes, and the caps that solve each fit problem.